

Alright. Why in the world do we care about LSMW in this paper when S/4HANA migration cockpit should ideally replace it? 🔥🎥 The simple answer is that not all people work on S/4HANA projects. 👍👍 You heard correctly. Though you may have heard of BTP, cloud computing, etc., the truth is that some clients are still not even using HANA databases, let alone S/4HANA. 🙏 Furthermore, LSMW remains active and vibrant. 😄😀
I can say with absolute certainty that tomorrow, if not today, a consultant in some corner of the SAP globe will need to add a new field to an already-existing LSWM. We continue with this tutorial with that belief. 🧡🤡
Assume you have successfully constructed an LSMW Batch Input Recording. Your client requests that you include a different field (from the same screen) in your recording one lovely morning. Thus, your initial thought might be to add the additional field to your recorder and restart recording your procedure. 💡💡 Why start from scratch again? We wish to demonstrate to you in this comprehensive lesson how to add a new field quickly and easily without having to record the entire procedure over.
Example Scenario:
Let’s say we want to delete the data for the “Date of Last Goods Movement” and add a new field from T-Code IQ02 to our recording.
- Open T-Code LSMW, select the project, subproject, and object you want to add a new field to, then hit the toolbar’s Continue button (F8).
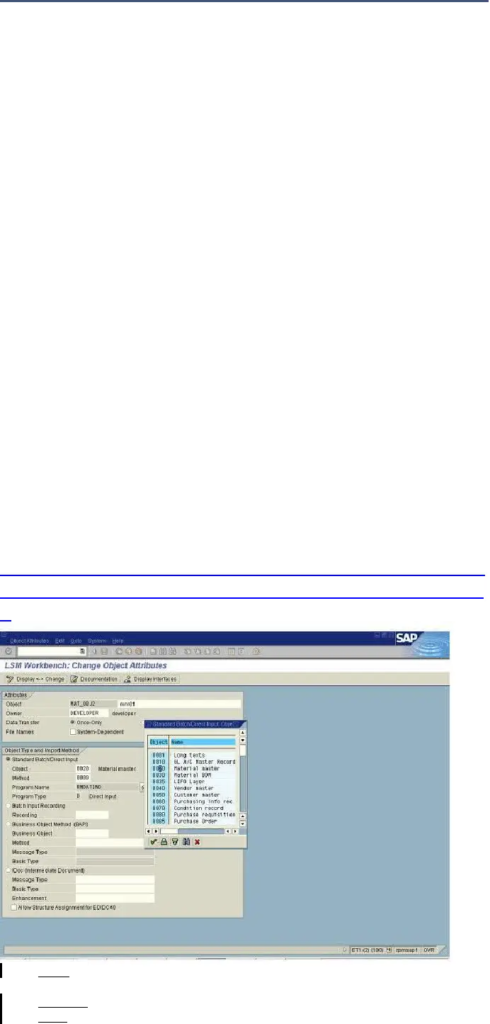
- Select “Define Object Attributes” on the following screen, then hit Execute from toolbar (or Ctrl + F8).
- To examine all of your recordings, select the “Recordings: Overview” button located in front of your recording name on the following screen.Click Edit Recording (or Ctrl + F2) from the toolbar after choosing the name of your recording. You must now add your new field to this list in order to view all of the action that has been logged here. Keep in mind that the new field needs to be on the screen that you previously recorded.
4- At this point, you should enter the T-Code (IQ02 in our example) for which you want to add a new field to your recording and locate the field you wish to edit (Date of Last Goods Movement).To access the Assistant page, click F1 and then select “Technical Information.” The Technical Information page should seem as follows to you.
If all of the data in the “Field Description for Batch Input” on this page matches the data you recorded in the previous step, duplicate the “Dynpro Field” for the following step.
Return to the Edit Recording screen. Using the data from the previous step, choose the Program Name and Screen Number. Then, click More -> Edit -> Add Dynpro Field (Extended) (or Ctrl + Shift + F4). You now need to fill in the Screen Field box with the saved data from the previous stage and click Continue (Ent).er).
6-Once the new field has been added to your screen, double-click it. On the resulting page, provide the requested information while keeping the Default Value clear and uncluttered. Next, carry on.
7- You may now save the recording process after adding your new field to your procedure. However, we still have some work to do to finish our voyage.
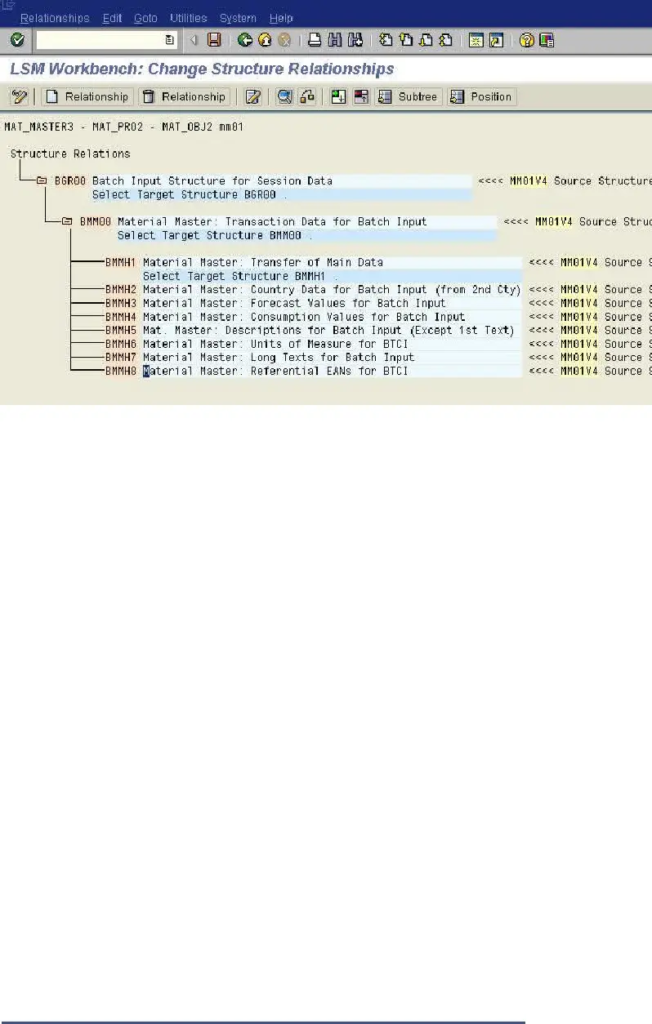
8-To add a new field to the input source, select the “Define Source Fields” step after returning to the Process phase. To modify the input structure, click the change button and select Table Maintenance from the toolbar (Ctrl + F9).
9- We need to add a new line to the source table in the new page based on our new field, as seen in the image below. Save the table now, then return to the process phase.
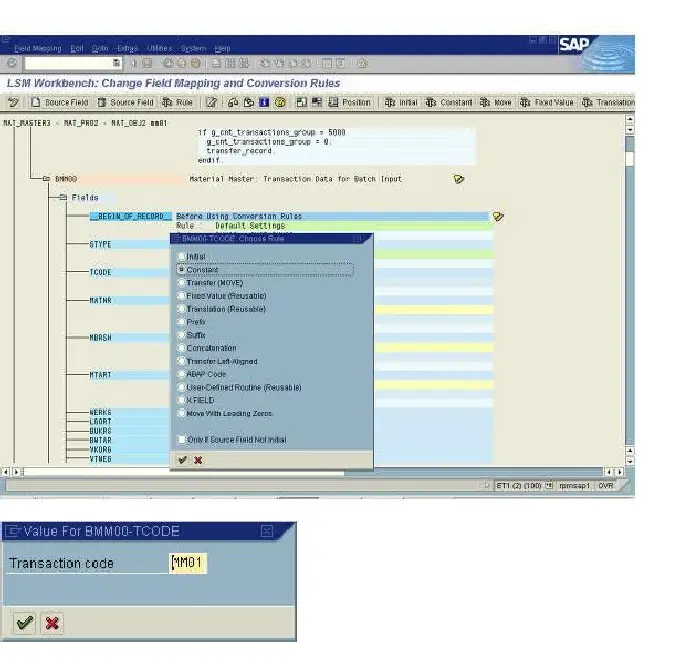
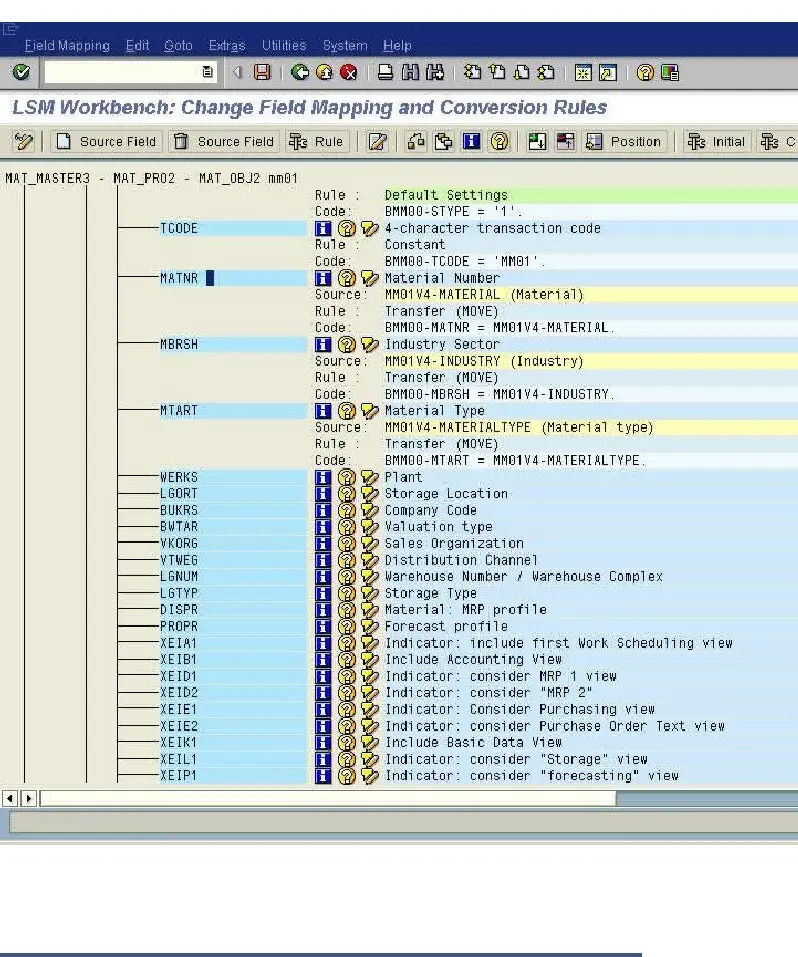
10- You should choose “Define Field Mapping and Conversion Rules” as the final step to finish our work and upload the new field mapping. Click Change and choose the newly added field from the new page. Select Source Field now using the Toolbar.
11–On the Assign Source Field page, select the new field and press Enter. Click Continue after disregarding any warning messages that may appear. You can now save this step as well.
12- That’s all there is to it. You have successfully added a new field to your LSMW Batch Input Recording, and it is now ready for testing.
What is the process for moving your revised LSMW from Quality to Production?
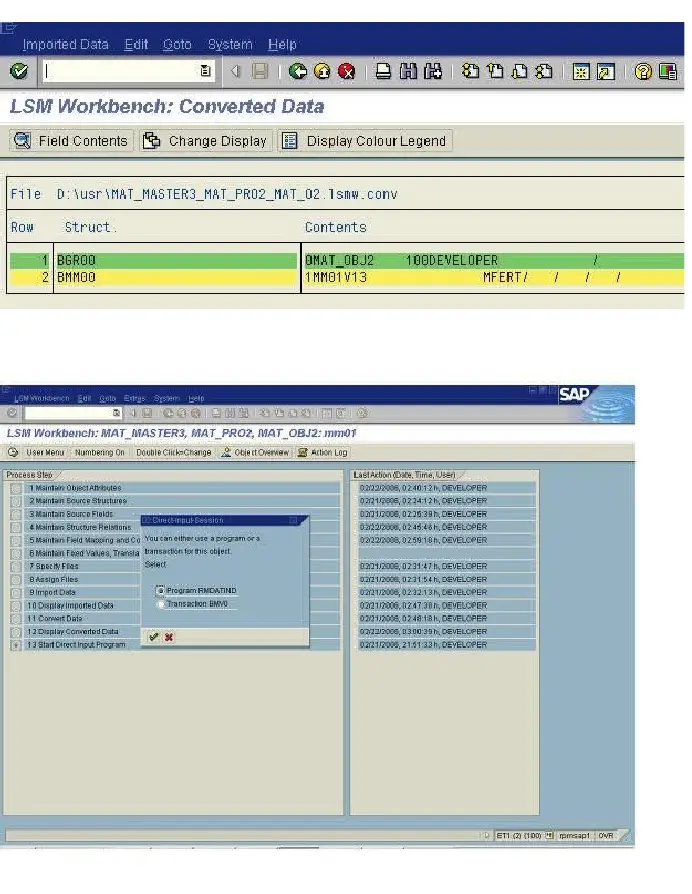
When everything functions as it should, transmit it to the P server. You can accomplish this in two ways. Either option two or the same procedure on P server can be done first. The project must be exported from this server and imported to a new server as a backup option. To export the project, navigate back to LSMW T-Code, enter your project, subproject, and object once more, then select More -> Extras -> Export Project (or press Ctrl + F8) to save it to your local computer.
Thank You for your valuable time.