

System Configuration and Installation were covered in Part I of our SAP Fiori Tutorial Step by Step Guide. You now understand how to determine whether your SAP Landscape System is prepared for the implementation and deployment of SAP Fiori. We would examine the Configurations connected to the Fiori App in more detail in this article.
System configuration checks are more base/administrative in nature, but configuration and design linked to Fiori apps are unquestionably the domain of front-end and ABAPer developers. Thus, ABAPers, hone your focus and remain receptive to learning about this practical subject of examining the SAP Fiori Library, verifying the Add-Ons for the selected Standard Fiori Apps (two instances), and turning on the Services.
Fiori Library
Authorizations (Admin & End Users) for the front-end UI Service and the back-end OData Service
Open the Fiori Launchpad
Designer and click “Start.”
Step 1 Fiori Library

How is a visit to the SAP Fiori Library necessary?
Visiting the SAP Fiori Library is essential for several reasons. Firstly, it provides comprehensive documentation and details about available Fiori Apps, including their functionality and prerequisites. Secondly, it helps in understanding the app’s integration requirements and customization options. Thirdly, the library offers valuable resources for troubleshooting and best practices. Additionally, it assists in aligning your implementation with SAP’s latest updates and innovations. Overall, the SAP Fiori Library is a crucial tool for effective planning and execution of Fiori App deployments.
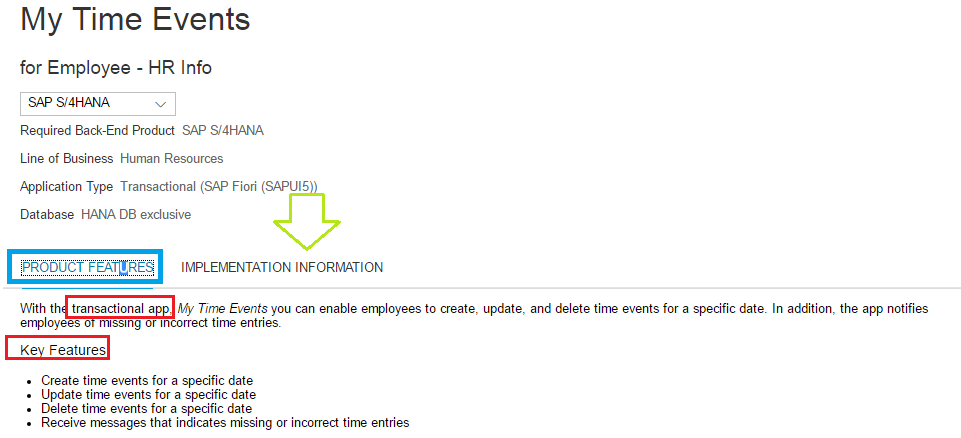
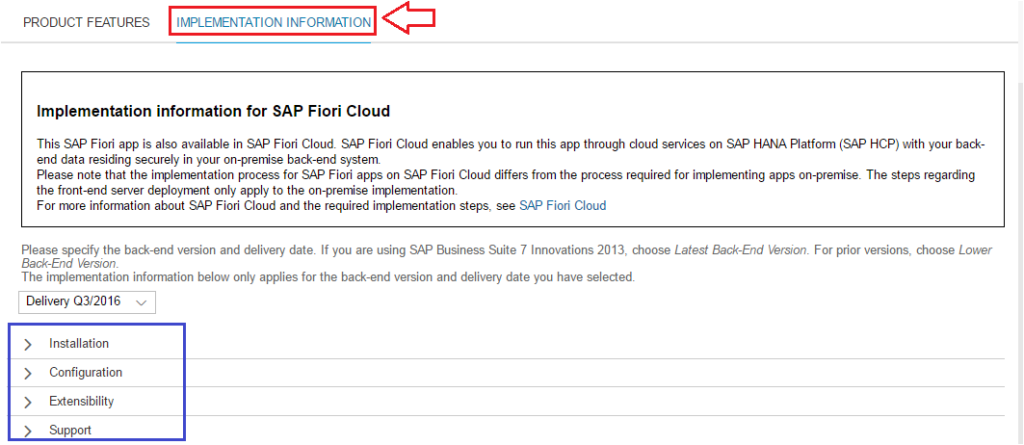
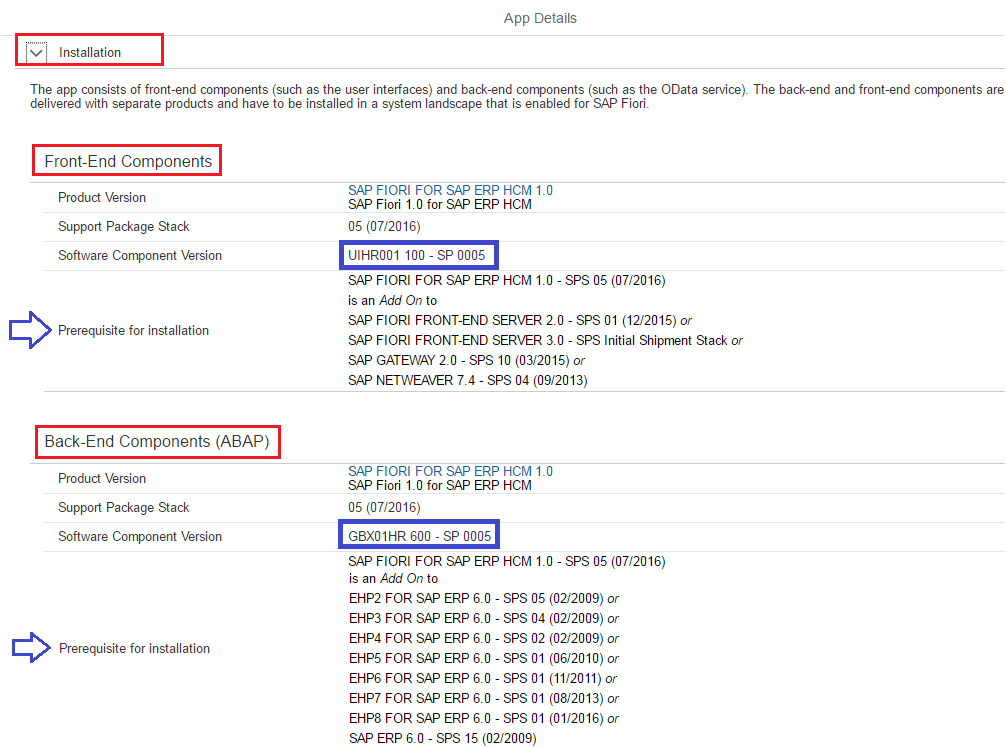
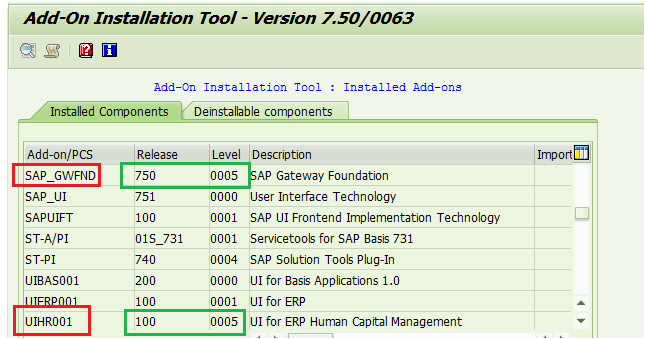
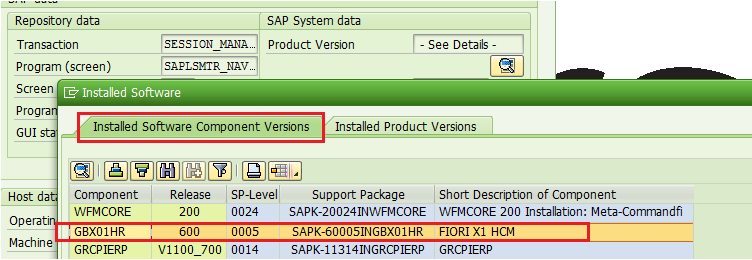
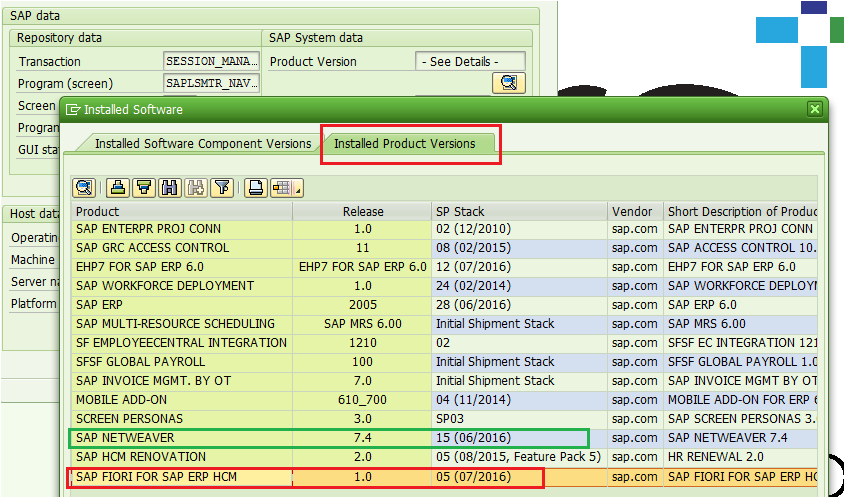
Verify the Product Versions Installed. It satisfies every prerequisite listed in the Fiori Library’s Installation Section.
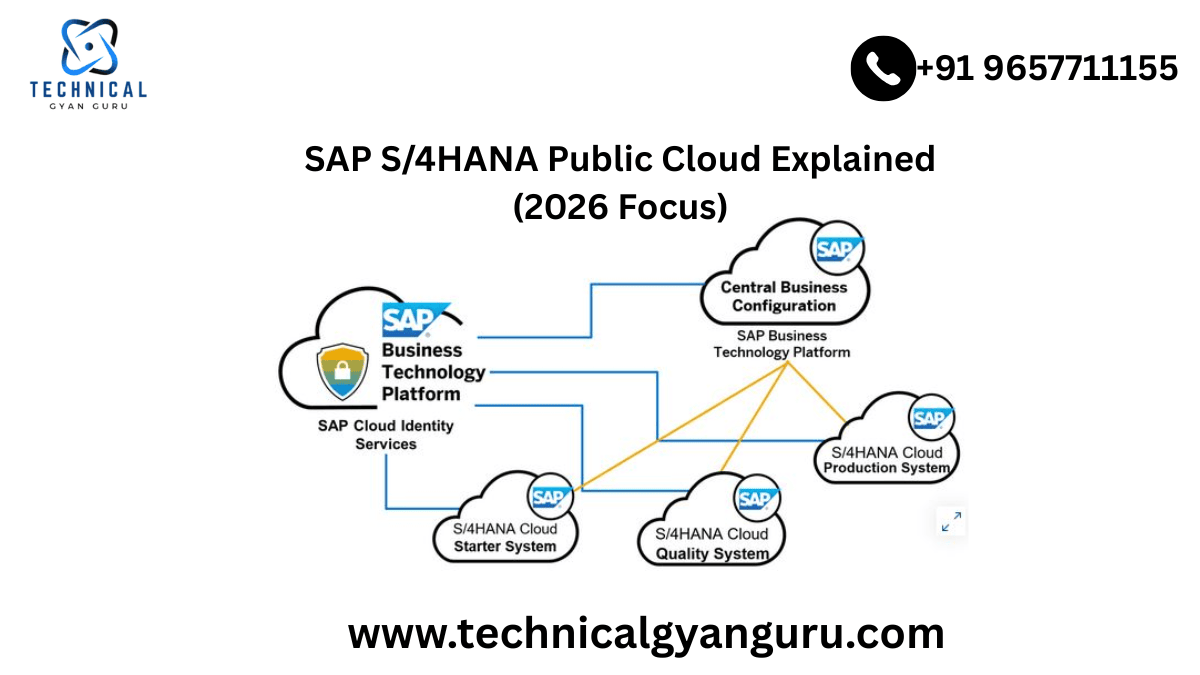
SAP ERP HCM USING SAP FIORI
Step 2: Frontend UI Service and backend OData Service activation
Configuring the “My Time Event” and “Approve Timesheets” (Version 2) apps at the same time will be done. You must follow the exact same procedures (hands-on for you) to approve timesheets as we would walk you through step-by-step for the My Time Event. Every screenshot seen above was taken using the My Time Event App.
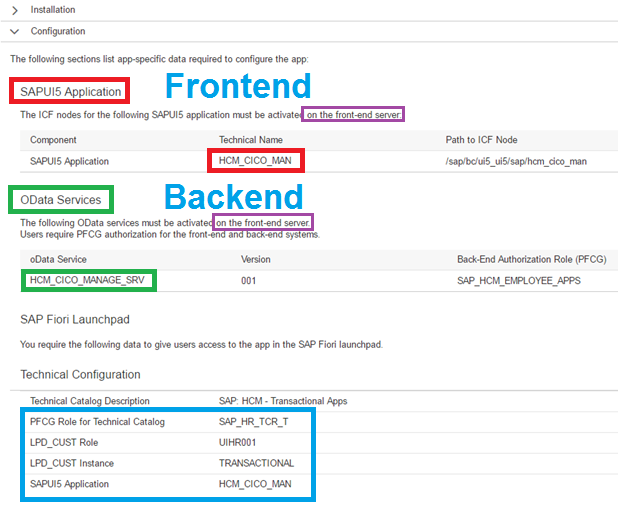
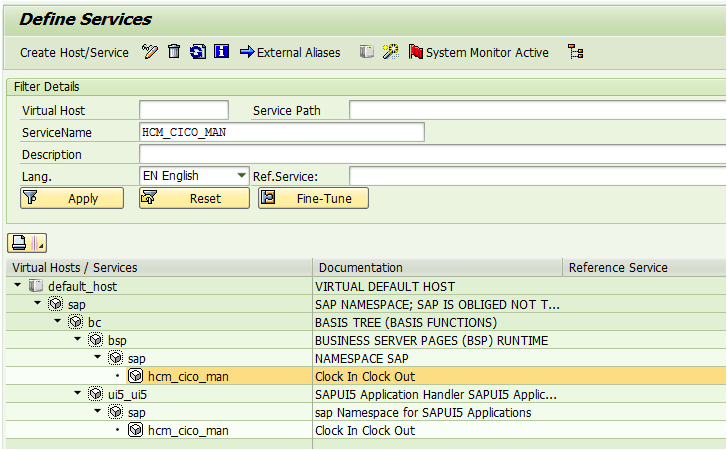
The SAPUI5 application (service) should be activated. Within the Front-end framework
Navigate to SICF t-code. Give the service name HCM_CICO_MAN (the Fiori Library provided this service name), then run. If the service is not active, right-click on its name and activate it.
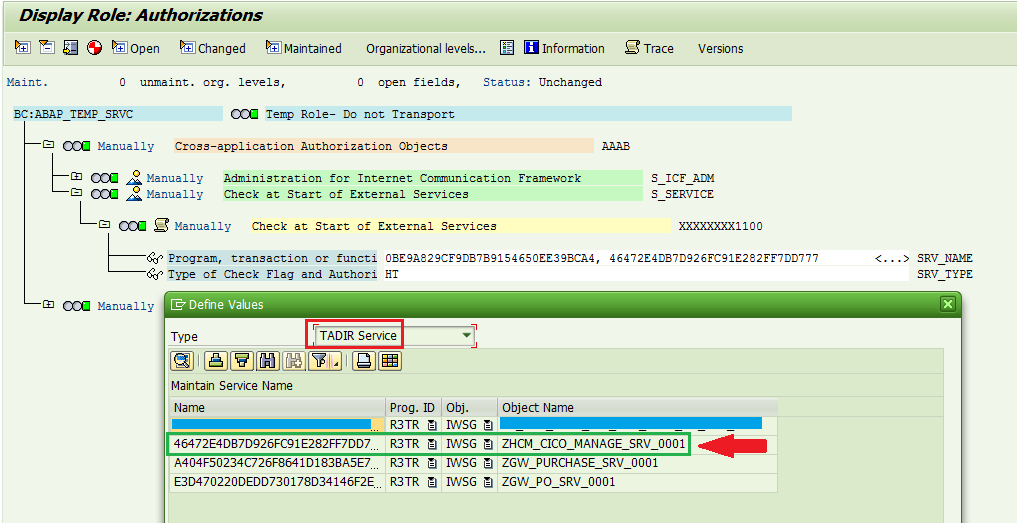
ii. Back-end OData Services are activated
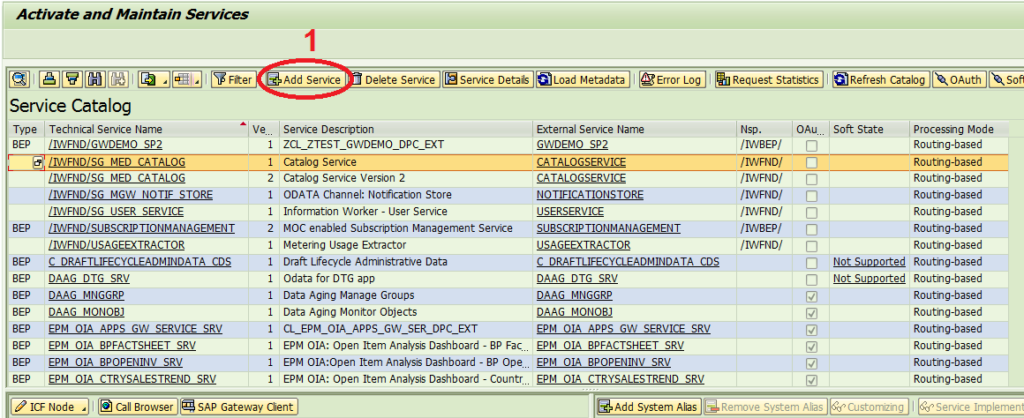
2) service name (HCM_CICO_MANAGE_SRV)
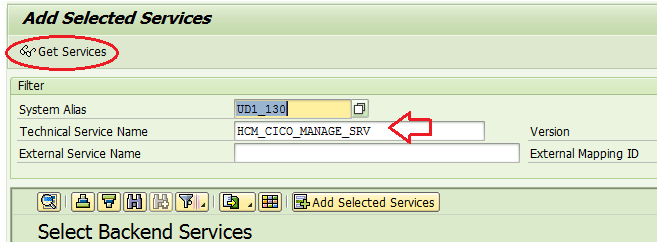
c) Click Add Selected Services after selecting the row.
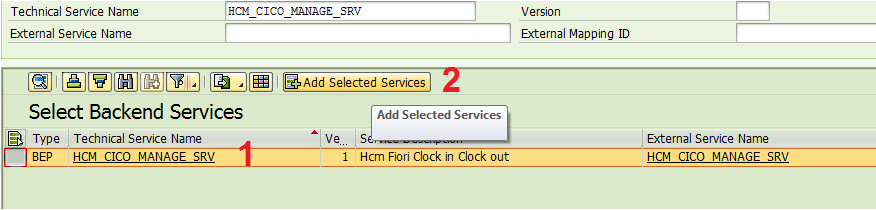
d) Stick with the Technical Service Name by default or modify it to follow the project naming practice.
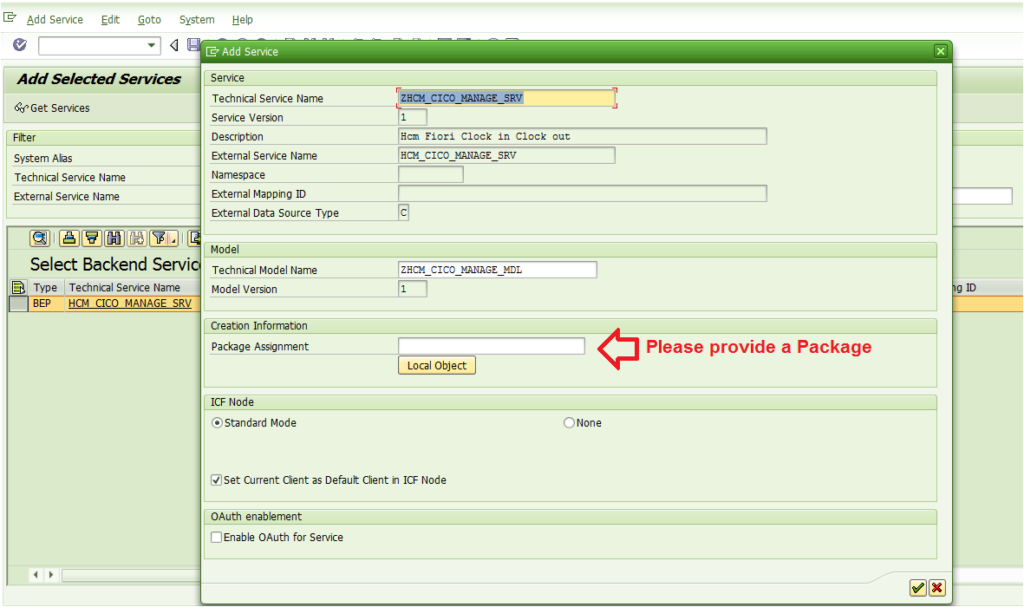
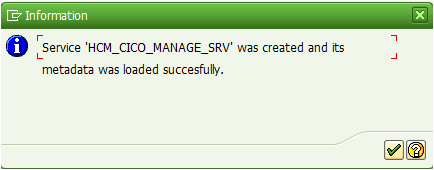
e) This Pop-Up Notification would appear;
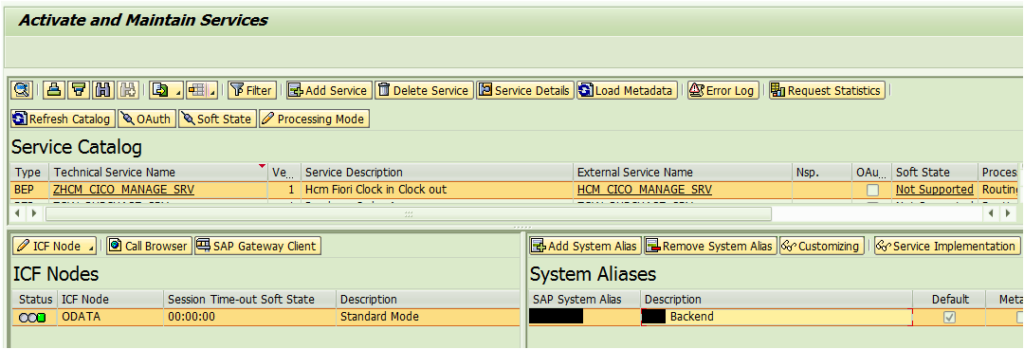
f) Return to the IWFND/MAINT_SERVICE t-code.
Step 4: Designer for Fiori Launchpad
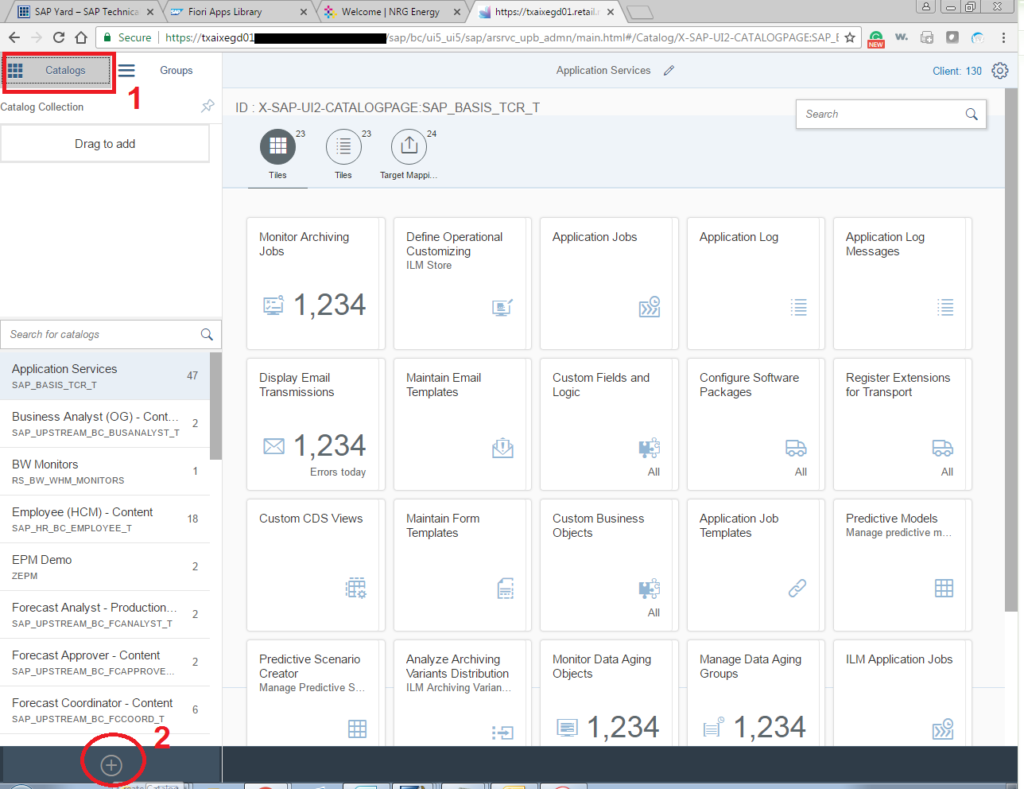
How can we find out our SAP system’s hostname and port number?
Use the t-code /UI2/FLPD_CUST command or navigate to your Fiori Launchpad Designer URL. This is what a blank screen should look like.
Click the plus icon at the bottom after selecting the Catalog Menu.
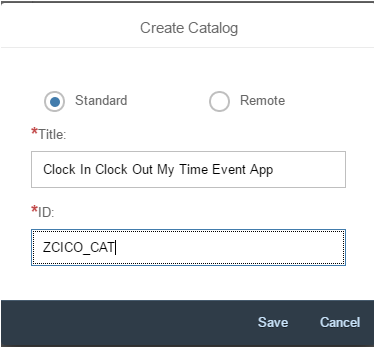
Create Reference& Delete
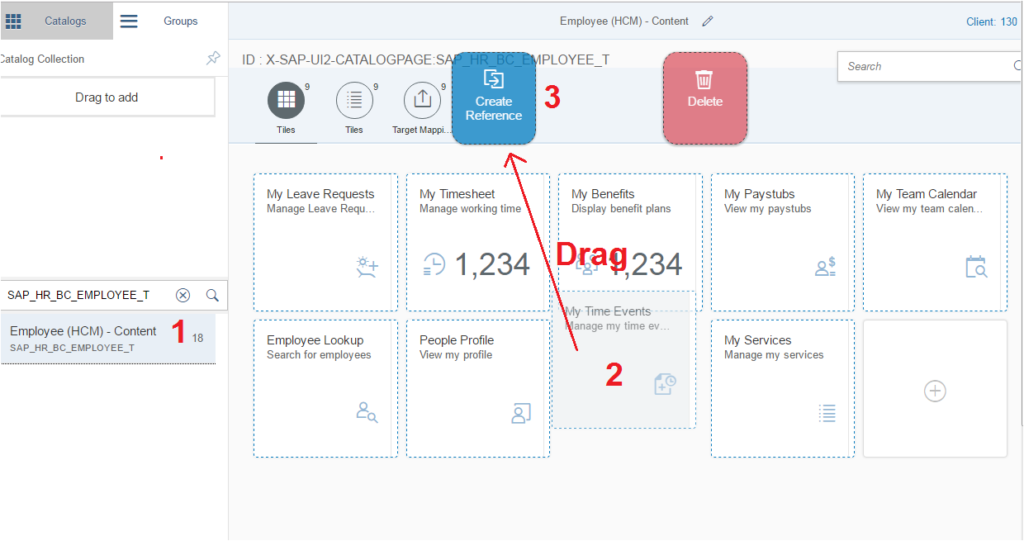
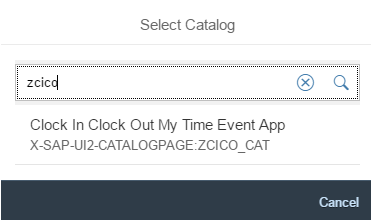
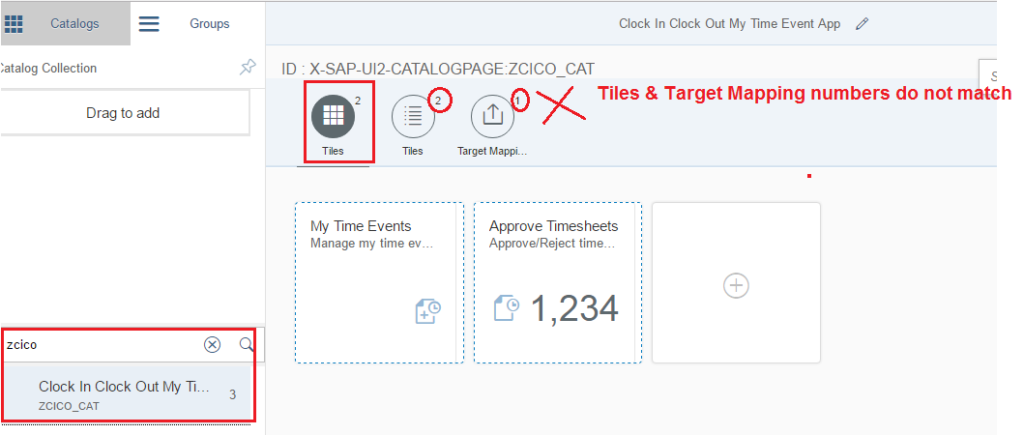
As we previously stated, the numbers for the tiles and the target mapping should match. But in this instance, it does not match.Let’s now add the target mapping.

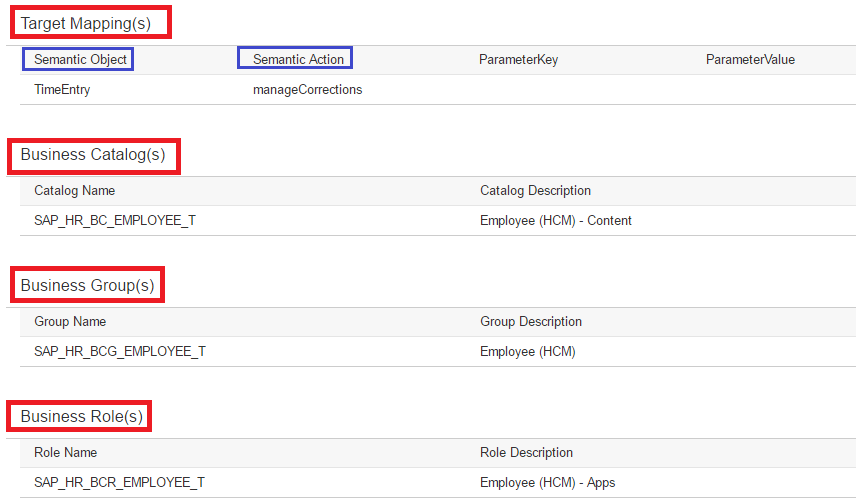
Make a note of the action and semantic object.


Let us review our customized catalog once again.Tiles and Target Mapping match this time.

Verify that the Tiles are still recognized.


Why may the Tiles/Apps Reference be broken?


Now us examine the customized catalog tile once more.

You will no longer see a Reference Message when you click on the Employee Time Events tile.Have you noticed that the dotted border on the non-reference tile in the preceding image disappears but remains on the reference tile?

Clicking on the Employee Time Events tile will no longer result in a Reference Message.In the above image, have you observed that the dotted border on the non-reference tile vanishes but stays on the reference tile?

Now let us add the custom Catalog to this group.


Since we added two Tiles in the Custom Catalog, we have two available for the group.


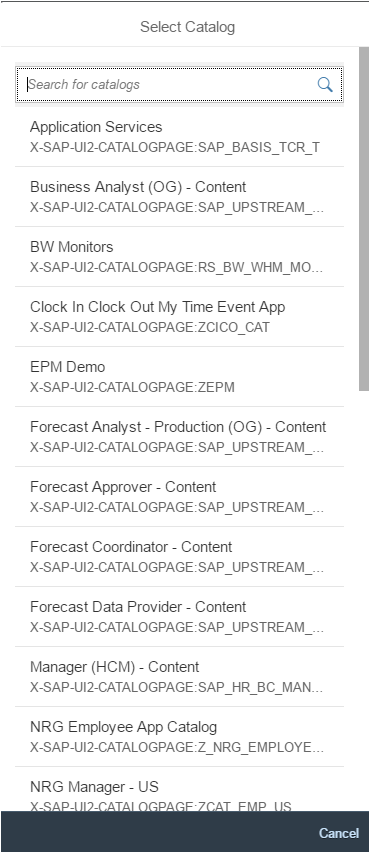
How may a SAP user be assigned to the new Catalog and Group?
Answer: Create a role by going to t-code PFCG. Select Menu, Insert Node, SAP Fiori Tile Catalog, and Group each item individually.


Step 5) Start the Fiori Launchpad
http://hostname:port number/sap/bc/ui5_ui5/ui2/ushell/shells/abap/FioriLaunchpad.html


Keep in mind that we only added the Employee Time Events Tile to the Group.As a result, when we log into the Fiori Launchpad, just one tile is visible.As of right now, the Approve Employee Timesheet tile is hidden.Allow us to also include the approved employee timesheet tile in the group. There should be two tiles visible on the Employee Time Booking and Approval Group when we log in again.
How to use the custom Group to add the second tile:Visit the private group we set up. Include the Employee Timesheet Approval Tile.


All Green.


The second tile has been added to the Group. Let’s log back into the Fiori link once more. The second tile would also be visible to us. I hope this makes it clear that in order for the catalog tiles to be accessible to the user, they must be included to the group.
Without writing a single line of proprietary code, let’s test the two apps that we recently built and implemented using the SAP delivery model.
The My Time Event App
My Time Event App

Approve Timesheets

Thank you! You’ve completed the end-to-end implementation of two standard Fiori Apps.